Deploy a Chatbot with AWSsagemaker using JumpStart
Overview
Amazon Sagemaker provides a convenient service to deploy the SOTA open-source model in minutes, which is particularly useful when you want to check if a newly published model is a good solution to a problem in your special domain.
Generally, the deployment follows a special invocation flow.
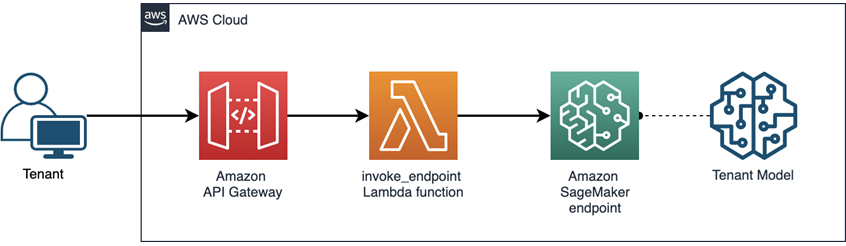
- Model: Deploy the pretrained model to Sagemaker and create an endpoint and wait for serving. This step can be done by a few clicks in JumpStart.
- Lambda: Create a Lambda function to invoke the endpoint. It will pass the input from the user request to the endpoint and return the model output. It will only be invoked when a request is received. Therefore, it will save resources and cost by the on-demand service.
- API Gateway: Add an Amazon API Gateway for receiving requests and calling the lambda function as needed.
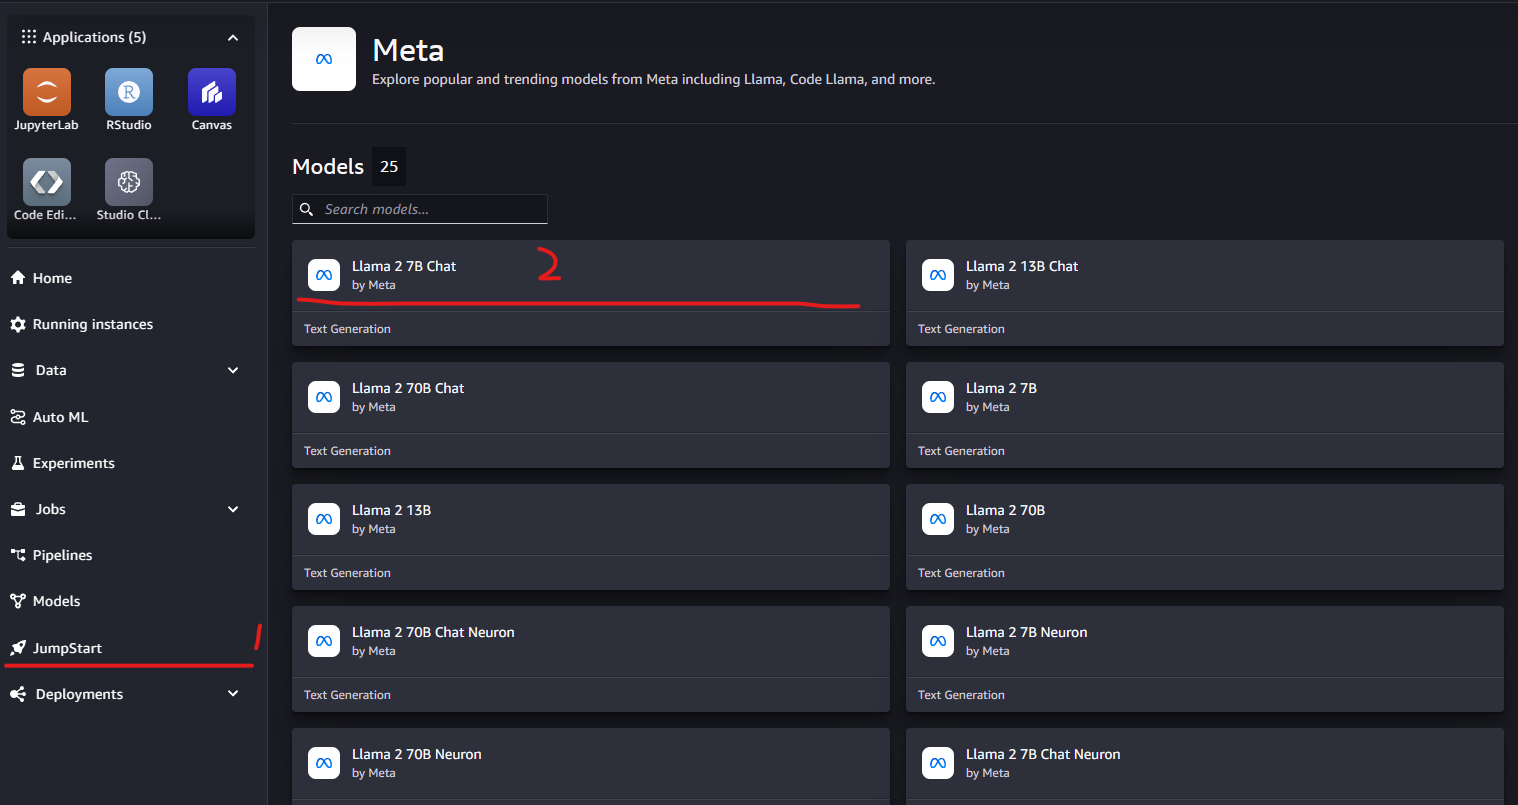
Create Domain
To begin with, we need to create a Domain in AWS to run all the service.
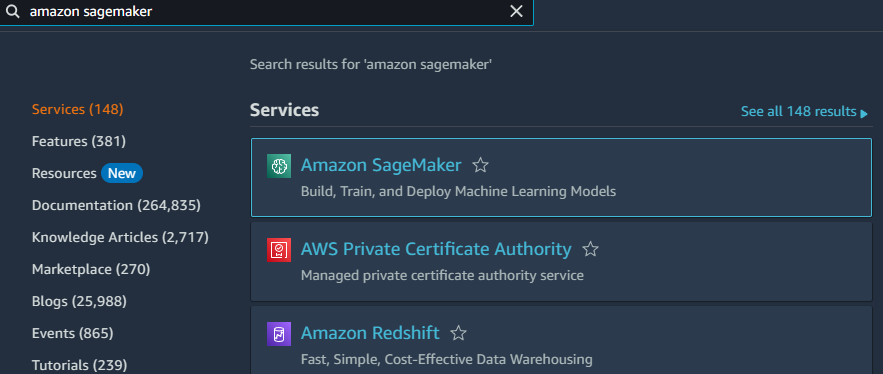
- Log in your AWS Console and search
Amazon SageMaker
- On the left tool bar, look for the
Admin configurationsand hitDomains, then clickCreate domainon the page.
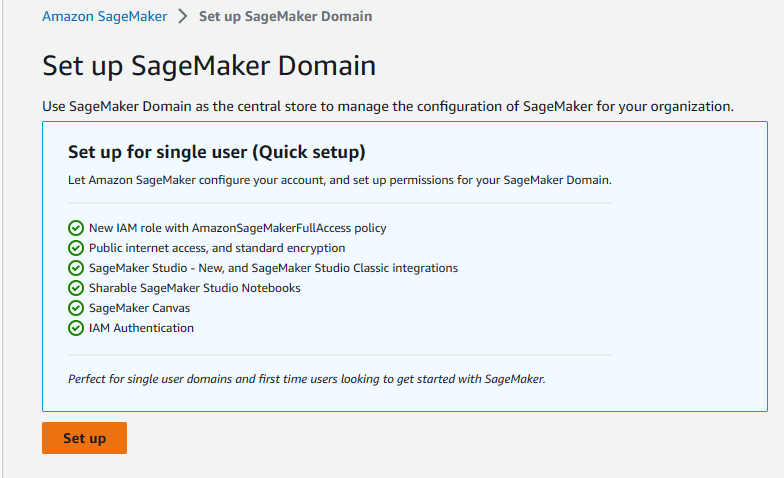
- Wite for few minutes, we will see a new domain created on the list.
Deploy AWSsagemaker Endpoint in JumpStart
We will use the SageMaker Studio to deploy a pretained model with JumpStart.
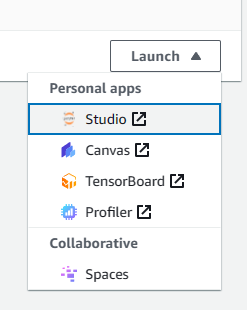
- Click the new created domain and open the drop down menu on the right side. Open the Studio.
- We will deploy a Llama2 model. Hit
JumpStart, go to themetalist and find theLlama 2 7B Chatmodel and clickDeployon the top right.
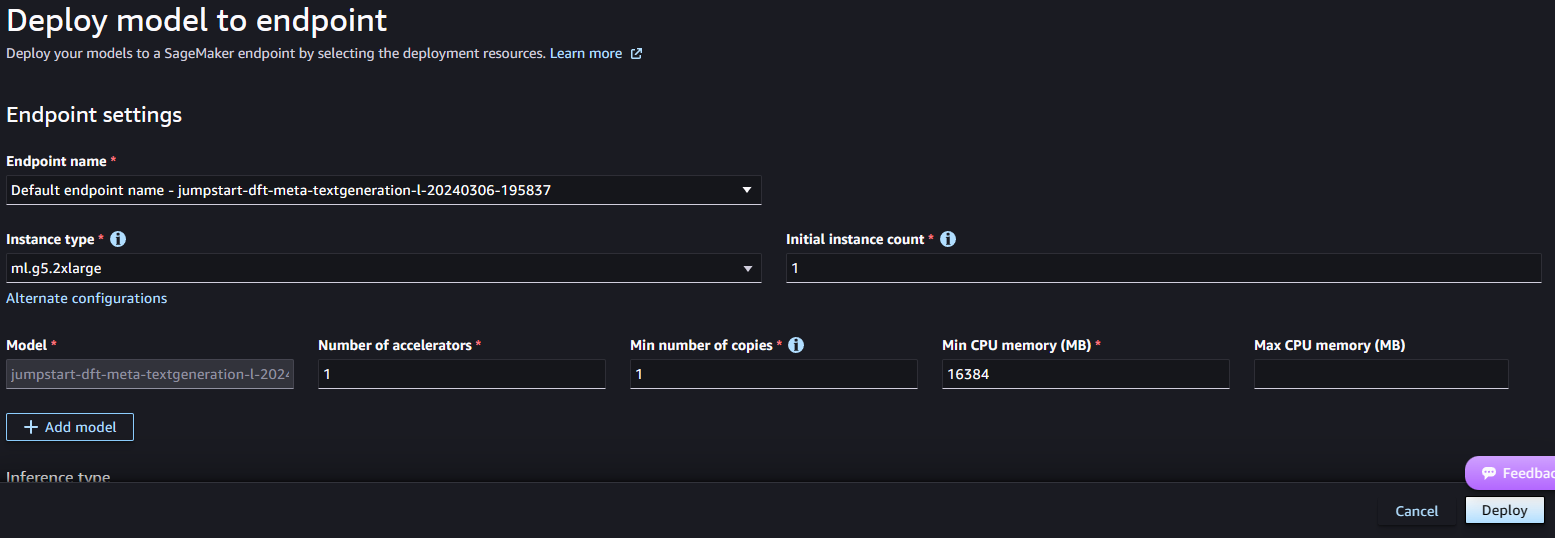
- Then use the default endpoint name and choose
ml.g5.2xlargeinstance to run the model, clickDeploy. After few minute, the endpoint deployment will be completed. Coutious: This deployment will cause payment. The instance we selected will cause around 1.7$/hr. Please makesure you clean up all the service following the cleaning up guide to avoide extra cost Clean up
Test The Endpoint
- Wait until the endpoint and model are both
In service.
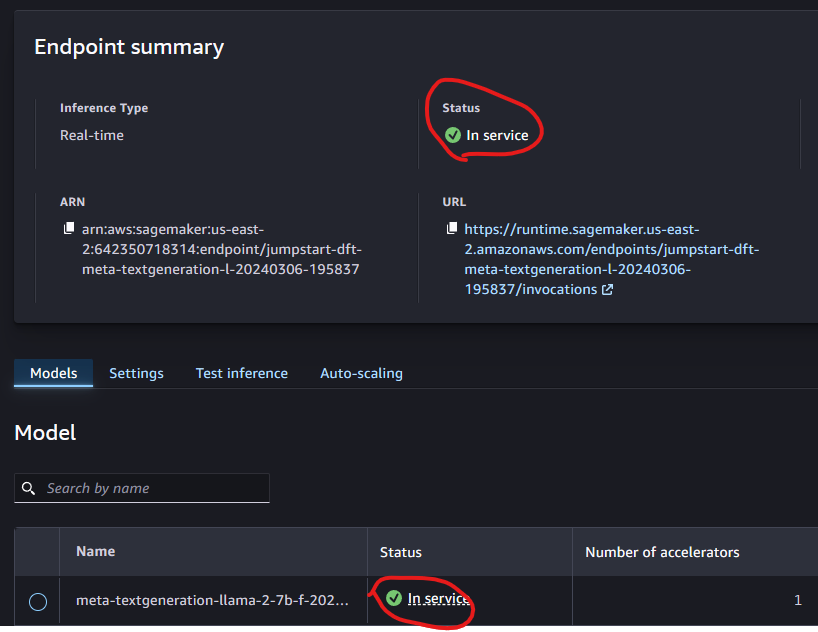
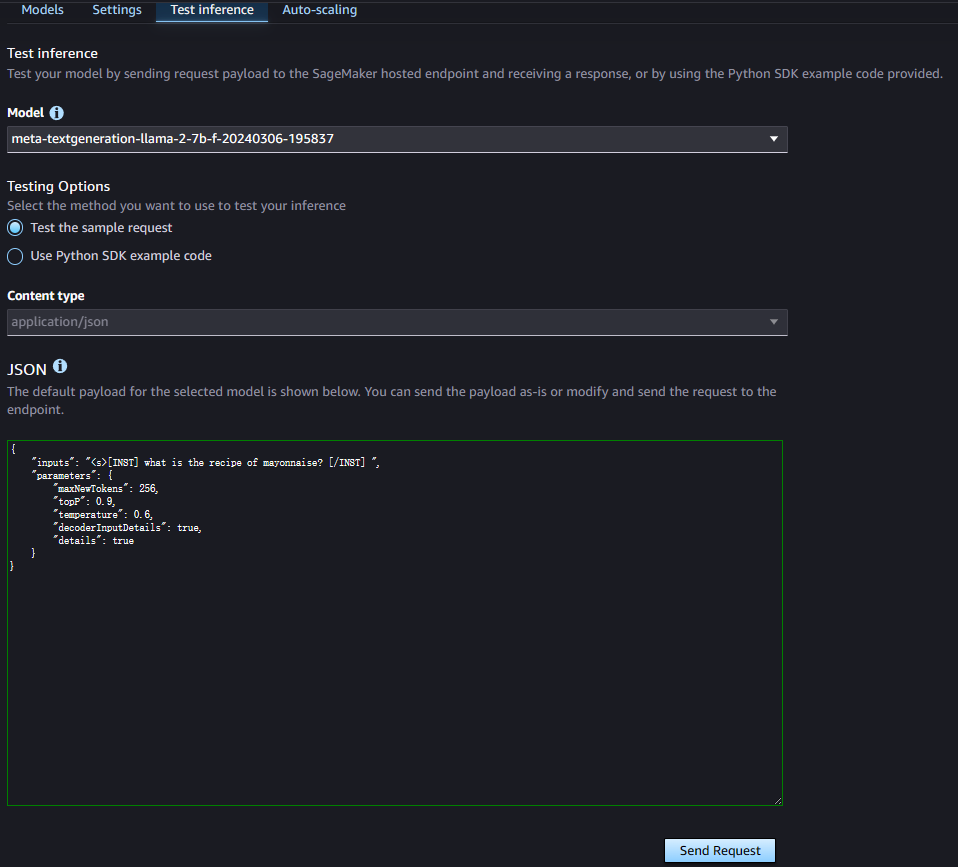
- Go to
Test inferenceand hitTest the sample request, you will see a sample request in JSON format. ClickSend Requestfor a model prediction. If the endpoint work well, you will get an response also in JSON format.
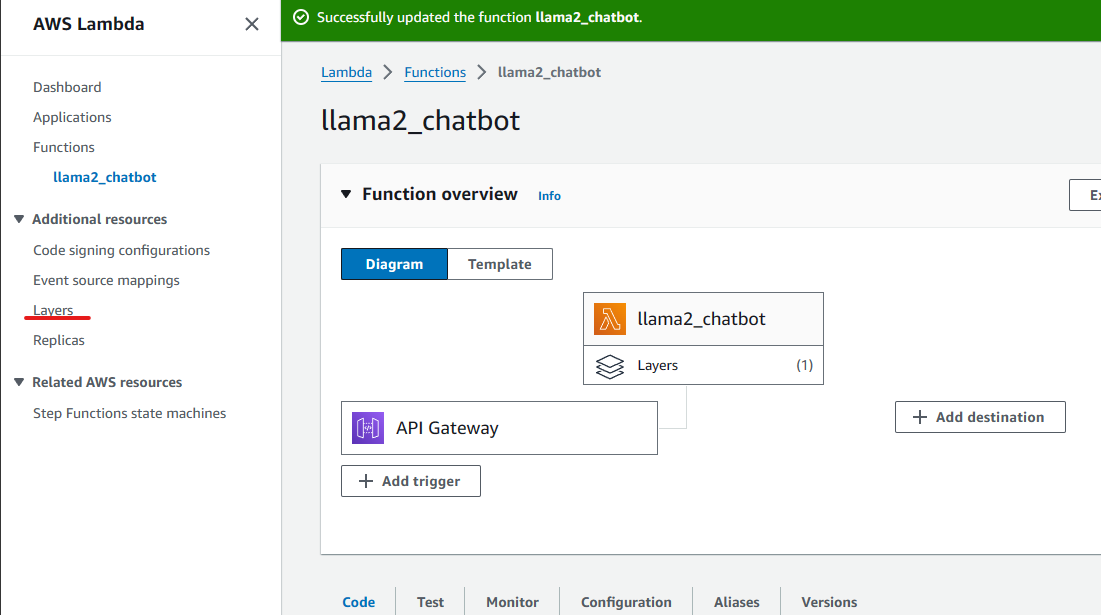
Create a Lambda serverless framework
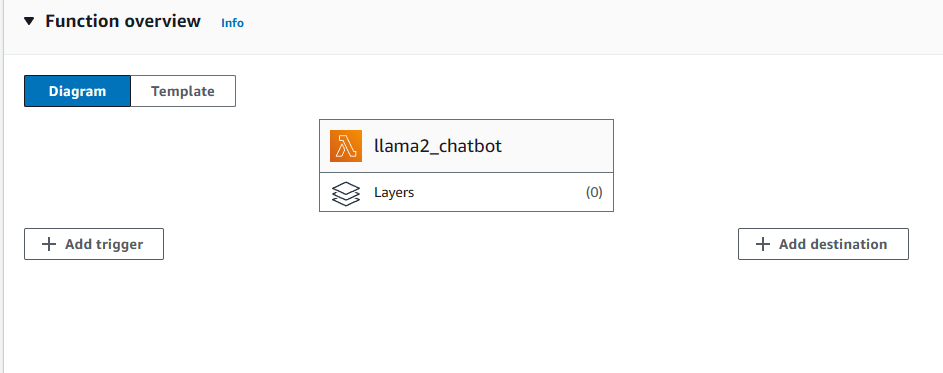
Now that we have a endpoint ready for service. We need a trigger and a handler to use this service. We will use Lambda function as a handler and API Gateway as trigger.
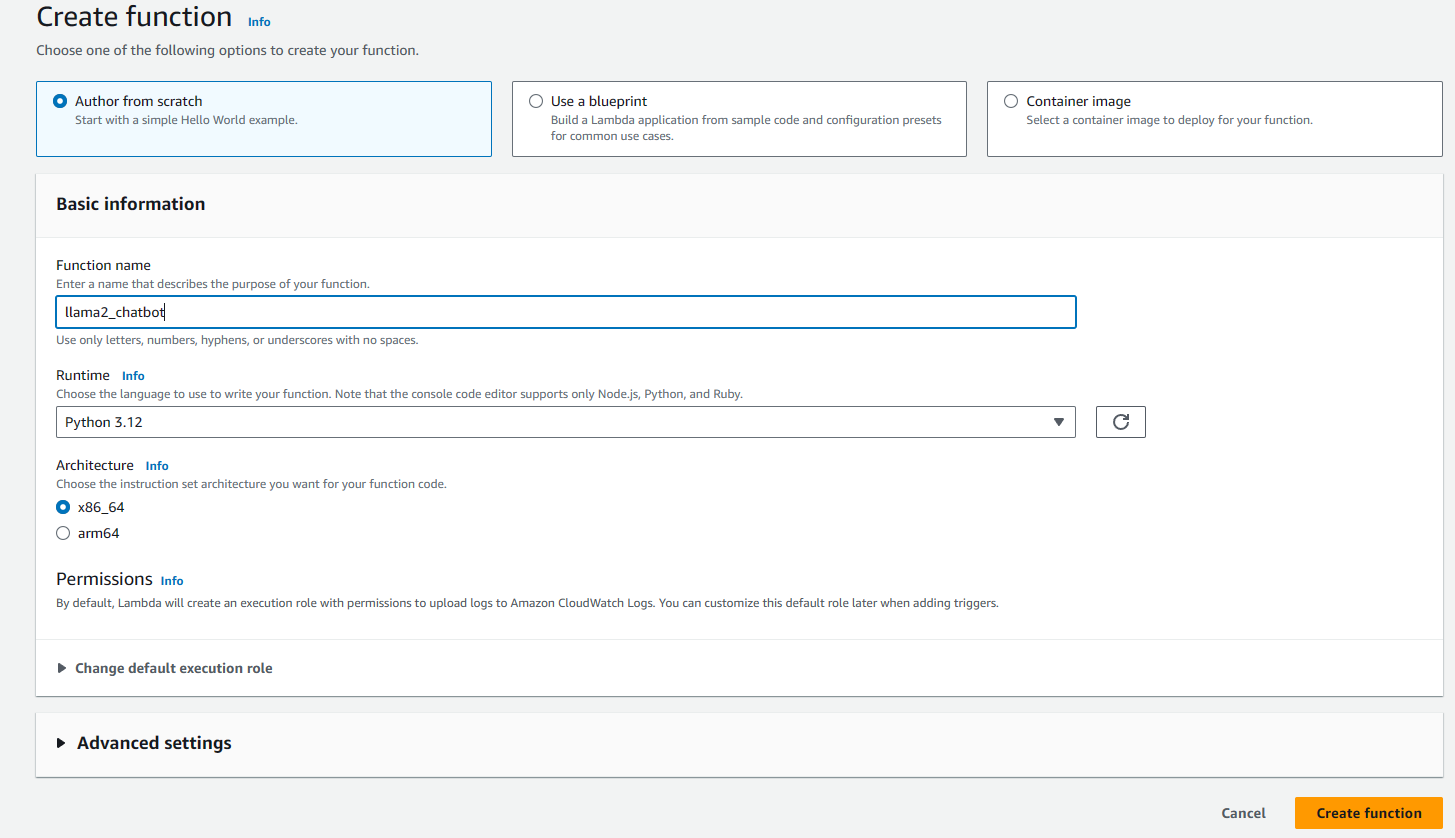
- Back to AWS Console, search for
Lambda, and clickcreat function. Then we give the function a name and running environment.
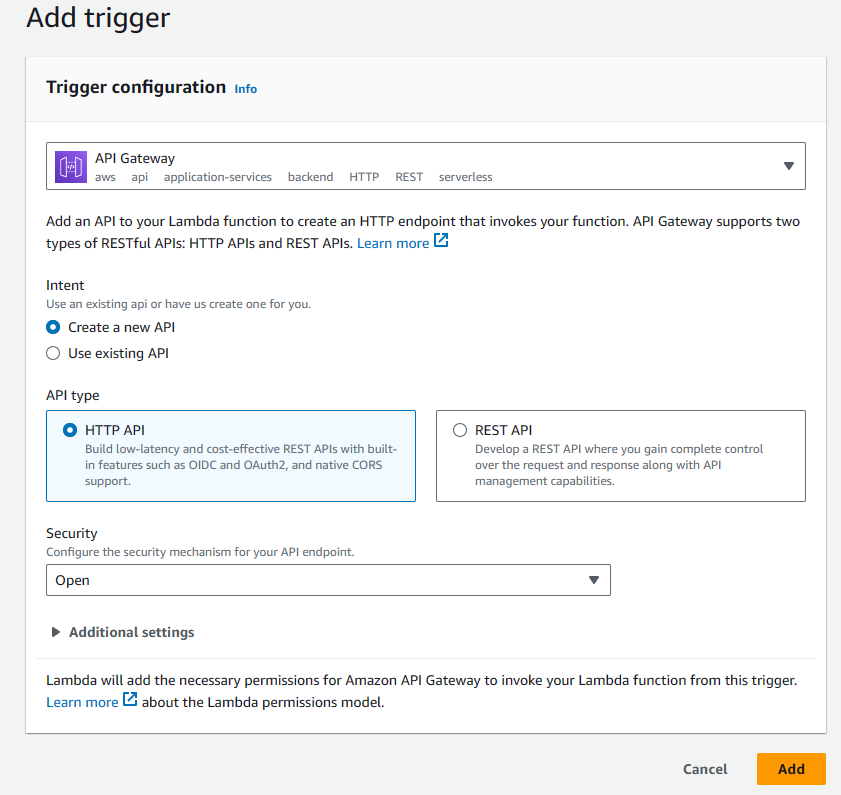
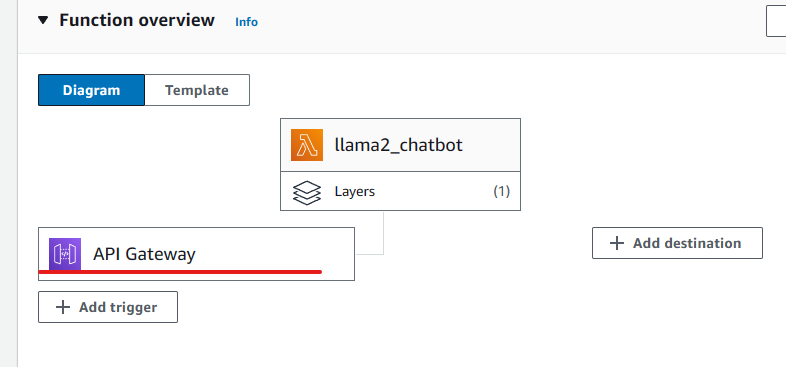
- Add a
API Gatewayto trigger the lambda function. ClickAdd triggerand search forAPI Gateway
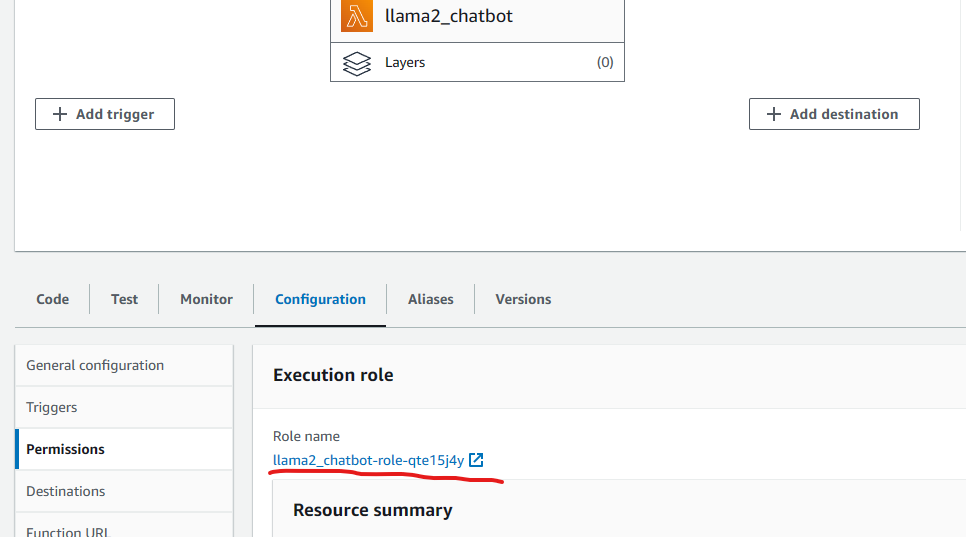
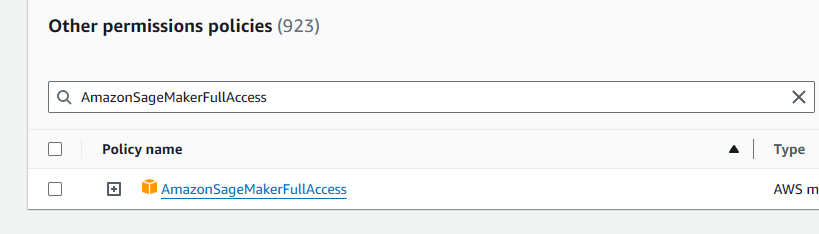
- Config permissions to role. Under the lambada function page, goto
configuration,Permissionsand click theRole name. Find thePermissions policies, click the drop down menuAdd permissions, and clickAttach policies. Then searh and add theAmazonSageMakerFullAccessto the list.

- Finally, write the lambda function to receive data, process by endpoint and return output.(Noticed that the lambda runtime environment may not have a up-to-date boto3 package, we need to add a
lambda layerfor setting up the dependencies, we will discuss it later on the Debugging section.)
import json
import boto3

ENDPOINT_NAME = "<your-endpoint-name>"
client = boto3.client("sagemaker-runtime")

def lambda_handler(event, context):
    print(boto3.__version__)
    response = client.invoke_endpoint(
        EndpointName=ENDPOINT_NAME,
        InferenceComponentName='<your-model-name>',
        ContentType="application/json",
        Body=json.dumps(event['body']),
        CustomAttributes="accept_eula: true"
    )
    response = response["Body"].read().decode("utf8")
    response = json.loads(response)

    return {
        'statusCode': 200,
        'body': json.dumps(response)
    }
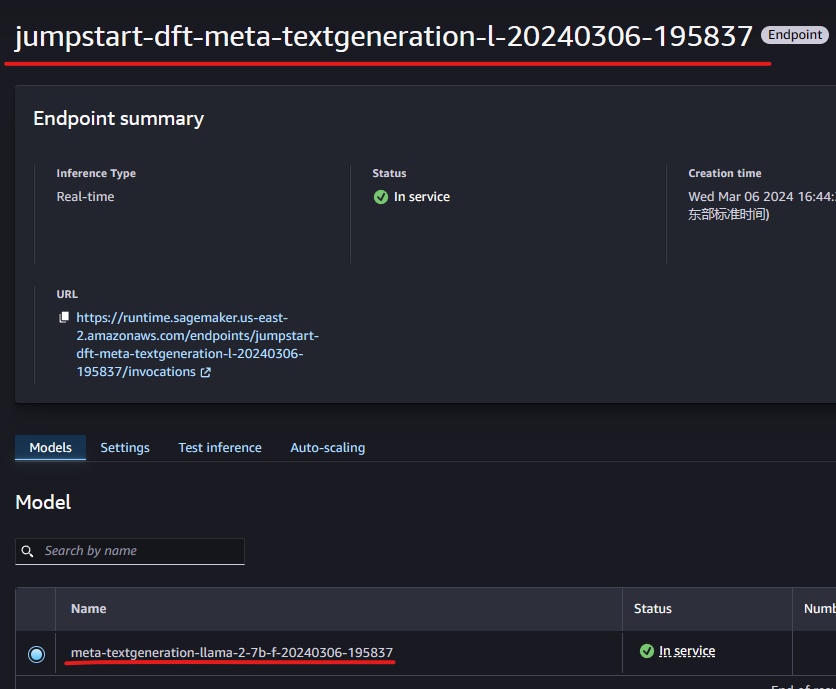
Specifically, you can copy your endpoint name and model name from the SageMaker Studio.:
Test by Postman
- In order to test the service, we need a api endpoint to send a post request, We can get it by here:

- Then We can use
Postmanto send a post request to this api. Here is the body of the request:
{
    "inputs": "<s>[INST] <<SYS>>\nAlways answer with emojis\n<</SYS>>\n\nHow to go from Beijing to NY? [/INST]",
    "parameters": {"max_new_tokens": 256, "top_p": 0.9, "temperature": 0.6}
}
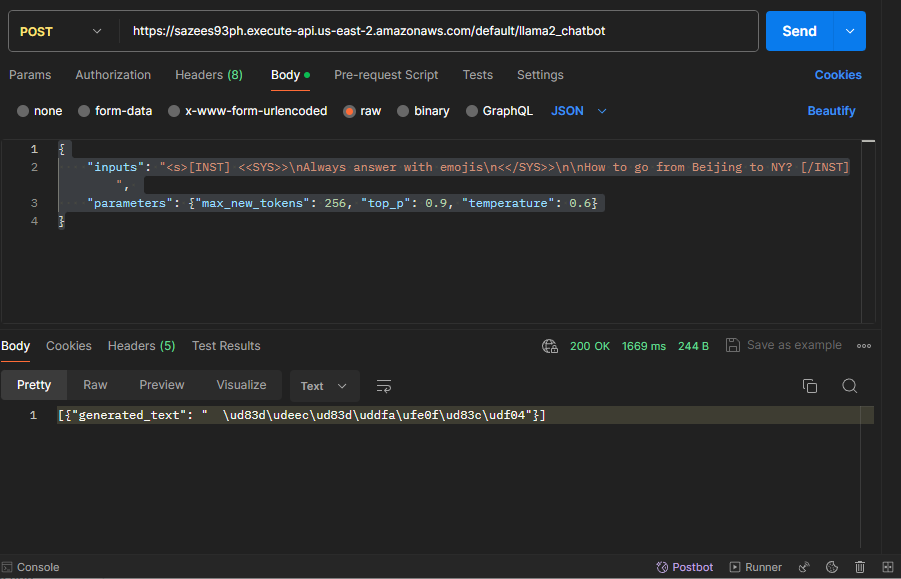
The response only contains emojis, which is exactly what we need.
By now, the Llama2 7B model is perfectly in service. We can design a website to send post requests to the API and start chatting!
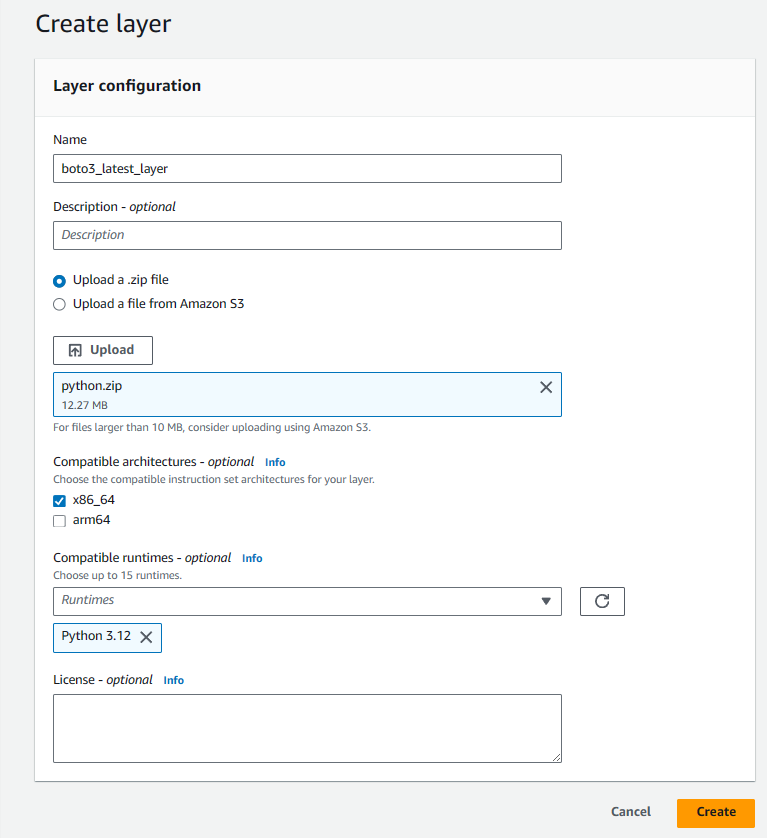
Debug Experiences
It is worth knowing that the default running environment of the lambda function in AWS is not working in this project because of the version of boto3 package. We have to deploy a layer and attach it to the lambda function. The layer package and the lambda function will be uploaded to the github repository. Feel free to download them and play around. Github_repo
Now let’s deploy a lambda layer given those files.
- Open the
layerspage in the right toolbar, and clickcreate layer.
- Upload the
python.zipfile from the git repository. Set up the configuration as what I am showing below. ClickCreate.
- Click the
Functionson the left toolbar, go back to the lambda function page and attach the layer to the function. Scroll down and clickAdd layer.The configuration should be the same as follows:
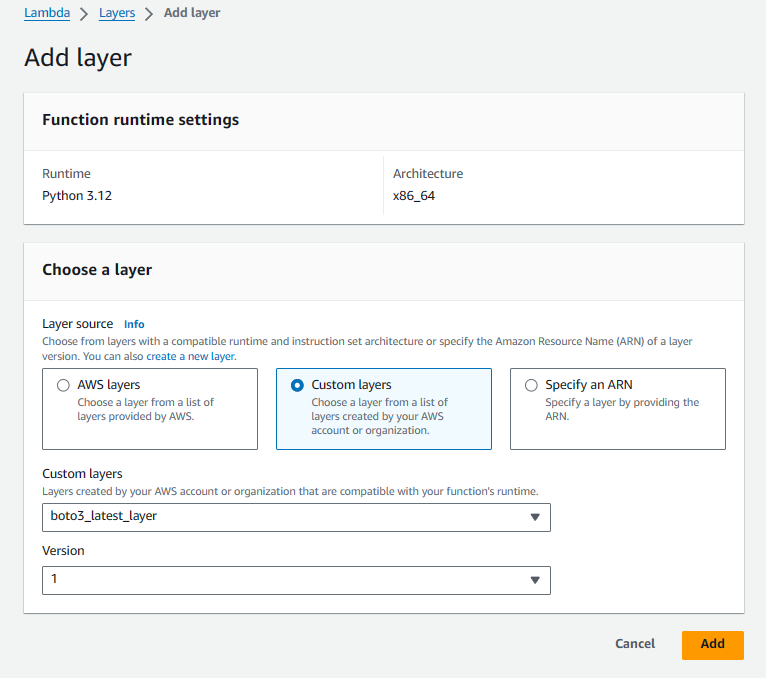
- The
lambda_function.pyfile in the repo is the lambda function you need on this experiment. Feel free to copy it and don’t forget to replace the endpoint name and model name.
That’s it! The lambda function should be run under the compatible version of boto3 library! You are all set! You can also create your own layer package with the binary files you want by following this Tutorial